SONOFF Web server and IAoT setup
Post ReplySONOFF Web server and IAoT setupPosted: Sunday, June 6, 2021 [17:19:44] - 1
With flexibility and safety in-mind SONOFF Basic is set with Web Server for easy and dependable access from LAN and Internet.  It can also be integrated in Home PBX to work from a touch-tone phone. Flushing a custom firmware was taken from Random Nerd Tutorials at: randomnerdtutorials.com/r.. SInce we have a Sonoff RF R2 V1.4 from 2019.11.08 version there are few re-flushing issues reported on the Internet. If Sonoff is properly connected to FTDI module - it just works by holding down the Sonoff button while connecting the VCC wire and releasing it in a second or two. Nothing else is required to put Sonoff into flushing mode. 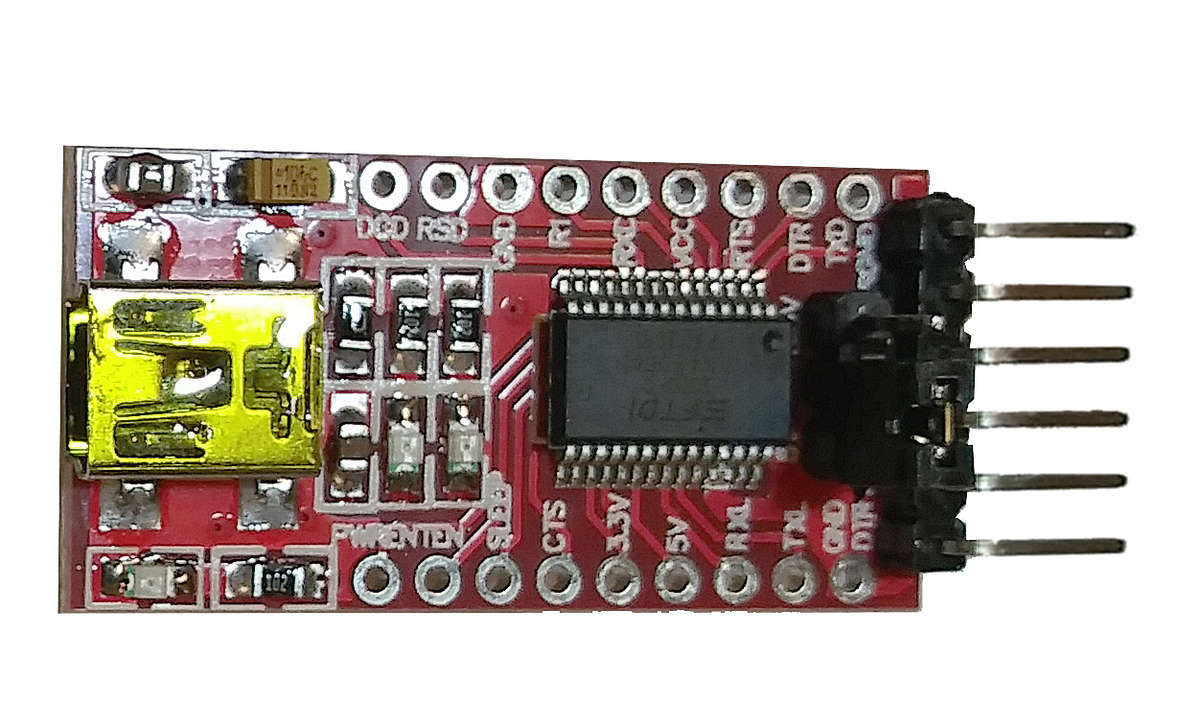 FTDI Module  Custom header soldered to Sonoff 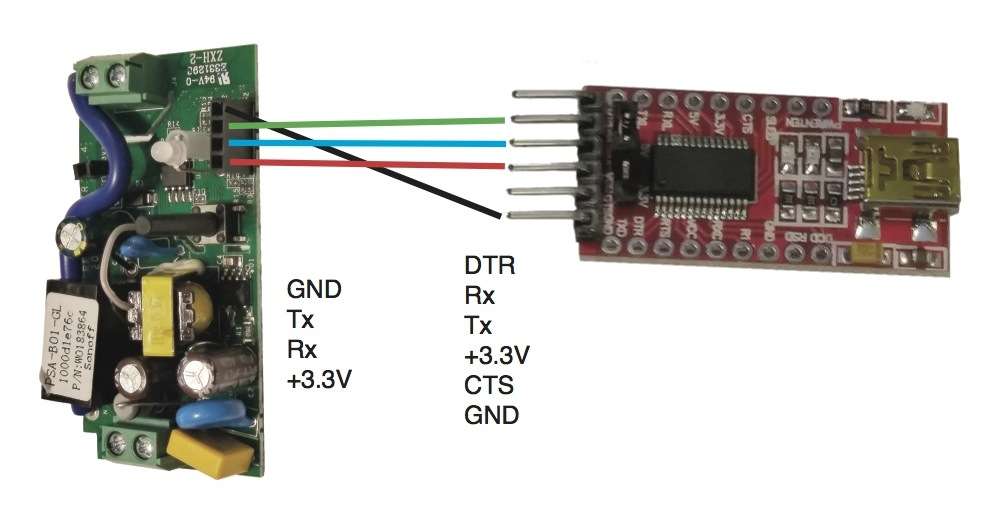 Sonoff RF R2 V1.4 <---> FTDI Module connection |
 Posted by:
Reflushing SONOFF RF R2 V1.4Posted: Sunday, June 6, 2021 [18:18:06] - 2
Reflushing: 1. Connect FTDI programmer to computer 2. Hold down the Sonoff button 3. Apply power to the Sonoff circuit 4. Release Sonoff button Your Sonoff should be in flashing mode and you can upload a new firmware. ESP8266 add-on should be installed in the Arduino IDE. Upload the full sketch to your Sonoff (replace with your SSID and password): Rui Santos Complete project details at randomnerdtutorials.com *********/ #include <ESP8266WiFi.h> #include <WiFiClient.h> #include <ESP8266WebServer.h> #include <ESP8266mDNS.h> MDNSResponder mdns; // Replace with your network credentials const char* ssid = "YOUR_SSID"; const char* password = "YOUR_PASSWORD"; ESP8266WebServer server(80); String webPage = ""; int gpio13Led = 13; int gpio12Relay = 12; void setup(void){ webPage += "<h1>SONOFF Web Server</h1><p><a href=\"on\"><button>ON</button></a> <a href=\"off\"><button>OFF</button></a></p>"; // preparing GPIOs pinMode(gpio13Led, OUTPUT); digitalWrite(gpio13Led, HIGH); pinMode(gpio12Relay, OUTPUT); digitalWrite(gpio12Relay, HIGH); Serial.begin(115200); delay(5000); WiFi.begin(ssid, password); Serial.println(""); // Wait for connection while (WiFi.status() != WL_CONNECTED) { delay(500); Serial.print("."); } Serial.println(""); Serial.print("Connected to "); Serial.println(ssid); Serial.print("IP address: "); Serial.println(WiFi.localIP()); if (mdns.begin("esp8266", WiFi.localIP())) { Serial.println("MDNS responder started"); } server.on("/", [](){ server.send(200, "text/html", webPage); }); server.on("/on", [](){ server.send(200, "text/html", webPage); digitalWrite(gpio13Led, LOW); digitalWrite(gpio12Relay, HIGH); delay(1000); }); server.on("/off", [](){ server.send(200, "text/html", webPage); digitalWrite(gpio13Led, HIGH); digitalWrite(gpio12Relay, LOW); delay(1000); }); server.begin(); Serial.println("HTTPserverstarted"); } void loop(void){ server.handleClient(); } Preparing Arduino IDE Having Sonoff device still in flashing mode. 1. Select your FTDI port number under the Tools> Port > /dev/cu.usbserial-A50285BI (in our case) 2. Choose your ESP8266 board from Tools> Board > Generic ESP8266 Module 3. Select Flash Mode: “DOUT” 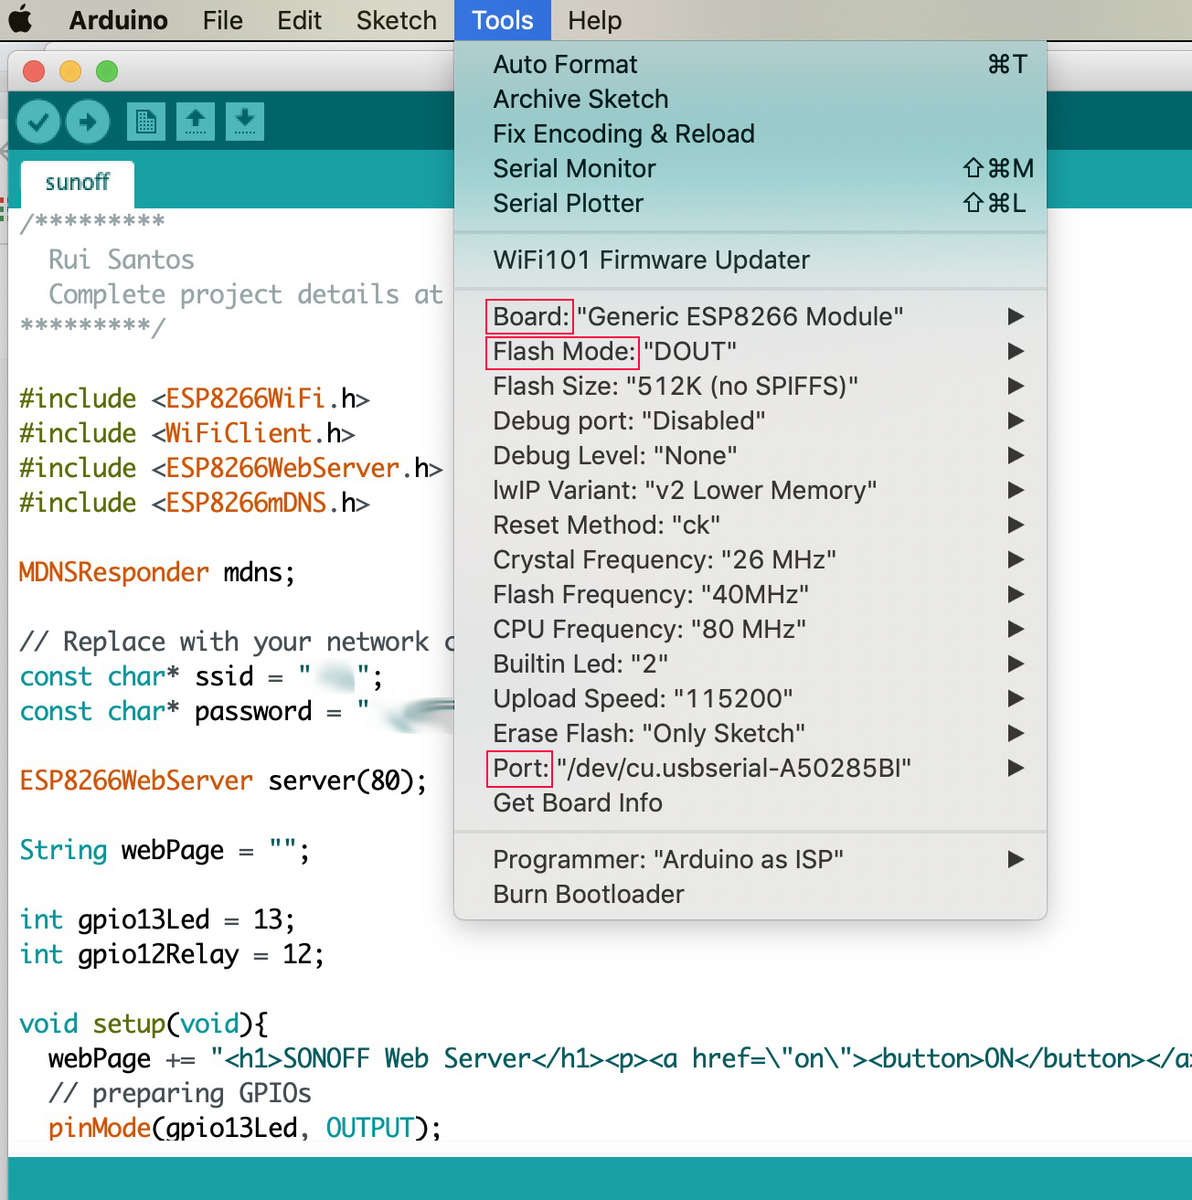 4. Press the Upload button Troubleshooting: If after uploading your sketch Arduino IDE prompts the following error message: error: espcomm_open failed means your Sonoff is not in flashing mode. |
SONOFF Web server firmwarePosted: Sunday, June 6, 2021 [18:31:18] - 3
When re-flushing finished - switch can be accessed VIA Web Browser, Node-Red or CURL. 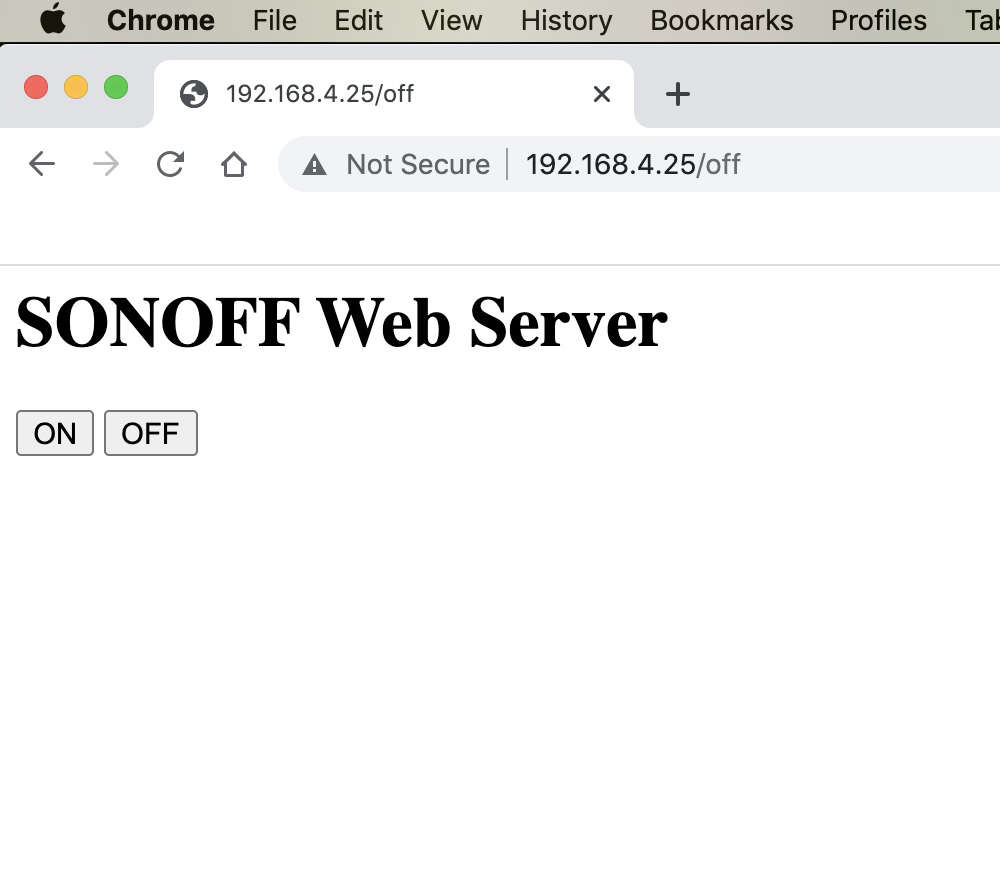 CURL is a great solution for DIY home automation as it can be sent from any computer on the LAN and any computer can be set for access from the Internet. Since FreePBX box by default has CURL installed - turning on/off Sonoff switch can be done from any touch-tone phone. |
SONOFF as a Power SupplyPosted: Thursday, May 5, 2022 [11:42:34] - 4
Using Sonoff as a 5V power supply for other IoT units www.codemacs.com/iaot/app.. as well as powering Sonoff from external power other than 110/220V |